Have you ever dreamed of making a dessert that looks as beautiful as it tastes? Something you can proudly set down on a table and know everyone will be impressed? If so, a crepe cake might be exactly what you’re looking for. Imagine layer upon layer of delicate, paper-thin crepes, each stacked high and separated by fluffy cream, chocolate ganache, or maybe even a rich custard. The best part? It’s easier to make than you might think, even if you’re new to baking!
In this guide, we’ll walk you through each step of creating a crepe cake from scratch. From preparing the crepe batter to perfecting the filling, this article will help you create a dessert that tastes as amazing as it looks. So, put on your apron, grab your favorite spatula, and let’s dive in!
Table of Contents
1. What is a Crepe Cake?
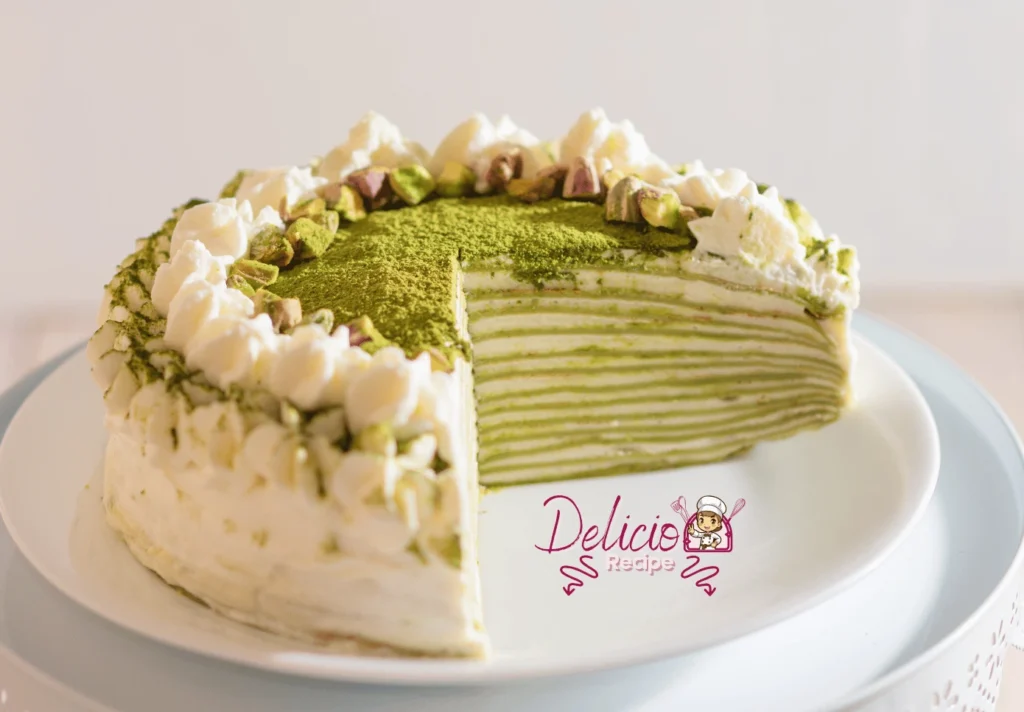
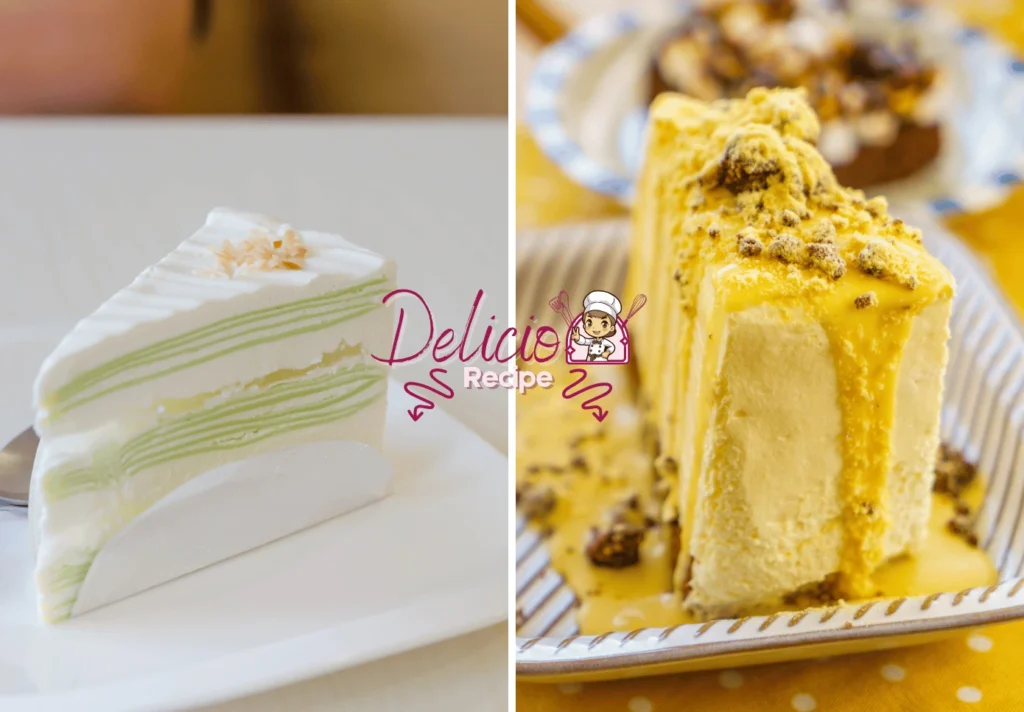
A crepe cake, also known as a mille crepe cake, is a multi-layered dessert made by stacking thin crepes with layers of cream or other fillings in between. Each bite melts in your mouth with a soft, creamy texture and a hint of sweetness. These cakes are stunning in appearance, with visible layers that create a lovely striped effect when you slice into them.
Originating from France, crepe cakes have become popular worldwide for their unique look and delicate taste. With endless flavor possibilities, from classic vanilla and chocolate to fruity or even coffee-infused layers, crepe cakes can be customized to suit any occasion or preference.
2. Ingredients for a Perfect Crepe Cake
Creating a delicious crepe cake starts with gathering the right ingredients. Each component—crepes, filling, and optional toppings—plays a role in achieving the perfect texture and flavor. Here’s a breakdown of what you’ll need, along with tips to help ensure your turns out light, fluffy, and flavorful.
Core Ingredients for Crepes
These are the essentials for making the crepes, the “cake layers” in your crepe cake. The ingredients are simple, but each serves a unique purpose in achieving the right texture and taste.
| Ingredient | Purpose | Suggested Amount |
| All-purpose flour | Provides structure for the crepes, giving them a soft but slightly chewy texture. | 1 cup |
| Eggs | Adds richness and helps bind the ingredients, making the crepes pliable. | 3 large eggs |
| Milk | The main liquid, which thins the batter and ensures crepes are soft and tender. | 1 ½ cups |
| Melted butter | Adds richness and prevents crepes from sticking to the pan. | 3 tablespoons |
| Sugar | A touch of sweetness that enhances the flavor of the crepes. | 1-2 tablespoons |
| Vanilla extract | Optional, adds a subtle flavor that complements both sweet and mild fillings. | 1 teaspoon |
| Salt | Balances the sweetness and enhances the overall flavor of the crepes. | A pinch |
Tips for Success:
- Flour: Use all-purpose flour for a balanced texture. For a lighter crepe, you can try substituting half the flour with cake flour.
- Eggs: Room temperature eggs blend more smoothly and evenly into the batter.
- Milk: Whole milk is recommended for a richer taste, but you can use 2% milk as well.
Choosing the Filling
The filling is what gives each bite of crepe cake its flavor and creaminess. Here are some classic filling options and suggested variations:
| Filling Type | Ingredients | Flavor Profile | Ideal Layering |
| Whipped Cream | Heavy cream, powdered sugar, vanilla extract | Light and airy with a subtle sweetness | Thin, spreadable layer |
| Vanilla Custard | Egg yolks, milk, sugar, cornstarch, vanilla | Rich and creamy with a hint of vanilla | Slightly thicker layer |
| Chocolate Ganache | Dark chocolate, heavy cream | Decadent and intense chocolate flavor | Thin layer |
| Fruit Preserves | Jam or preserves (strawberry, raspberry, etc.) | Sweet and fruity, adds a tangy contrast | Thin spread |
| Cream Cheese Filling | Cream cheese, powdered sugar, vanilla extract | Thick and tangy, great with berries | Moderate layer |
Basic Whipped Cream Recipe for Crepe Cake Filling
Here’s a quick whipped cream filling recipe for beginners:
| Ingredient | Amount |
| Heavy cream | 2 cups |
| Powdered sugar | 1/4 cup |
| Vanilla extract | 1 teaspoon |
- Whip the Cream: In a chilled bowl, whip the heavy cream with powdered sugar and vanilla extract until soft peaks form.
- Chill if Needed: If the whipped cream is too soft, refrigerate it briefly before using it as a filling.
Optional Toppings and Garnishes
The final touch is the topping, which can elevate the appearance and add a flavor boost. Whether you go for fresh berries or a delicate dusting of powdered sugar, these options can make your truly stand out.
| Topping | Description | Flavor/Appearance |
| Powdered Sugar | A light dusting for an elegant, classic look | Mild sweetness and delicate finish |
| Cocoa Powder | Sift over the top for a subtle chocolate flavor | Bitter-sweet flavor and rich color |
| Fresh Berries | Add strawberries, raspberries, or blueberries | Juicy burst of freshness, vibrant color |
| Chocolate Shavings | Use a vegetable peeler on a chocolate bar | Rich chocolate flavor, decorative |
| Edible Flowers | Add edible flowers for a delicate, floral finish | Visual appeal and light floral note |
| Caramel or Chocolate Drizzle | Drizzle caramel or chocolate sauce over the cake | Rich, sweet flavor and glossy look |
Tip: For a layered look, add a few berries or drizzle chocolate between layers to bring color and flavor into each slice.
3. Preparing the Crepe Batter
The first step in making a crepe cake is preparing a smooth, lump-free crepe batter. This batter will be the foundation of your cake, so take your time to get it right.
Starting Sentence: ” Preparing a smooth, lump-free batter is the first essential step in making a crepe cake.”
- Mixing Ingredients: In a blender, combine the flour, eggs, milk, melted butter, sugar, and vanilla extract. Blend until smooth, which helps to eliminate any lumps.
- Resting the Batter: Allow the batter to rest for at least 30 minutes, preferably in the refrigerator. Resting helps the flour completely absorb the liquids, performing in a more tender waffle.
- Consistency Check: After resting, the batter should be thin enough to spread quickly in a hot pan. However, add a little milk, one teaspoon at a time, If it’s too thick.
Tip: For a more uniform texture, strain the batter through a fine sieve before cooking.
4. Cooking the Crepes
Cooking crepes can seem intimidating, but with a few simple techniques, you’ll be making perfect crepes in no time.
Starting Sentence: “Making crepes takes some patience and skill, but with a few tips, you’ll be creating perfect crepes in no time.”
- Warm up the Pan: Warm a non-stick skillet over medium heat. Lightly coat it with butter or non-stick spray.
- Pour the Batter: Use about 1/4 cup of batter per crepe. Pour it into the pan and immediately tilt the pan in a circular motion to spread the batter evenly.
- Cook and Flip: Let the crepe cook for about 1 minute, or until the edges start to curl and lift. Flip carefully with a spatula, and cook for another 30 seconds on the other side.
- Cool the Crepes: Transfer each finished crepe to a plate and let them cool completely before stacking.
Go through this process until every bit of batter is finished. Aim for around 20 crepes for a standard crepe cake.
5. Creating the Filling: Cream and Flavor Variations
The filling you choose will add richness and flavor to each layer of the caCakeke. Here’s a basic whipped cream recipe along with some ideas for flavor variations.
Starting Sentence: “The filling plays a crucial role in the crepe cake, bringing the layers together while adding richness and flavour.”
Basic Whipped Cream Filling
- Ingredients: 2 cups of heavy cream, 1/4 cup of powdered sugar, and 1 teaspoon of vanilla extract.
- Instructions: In a chilled bowl, whip the heavy cream with powdered sugar and vanilla until soft peaks form.
Flavor Variations:
- Chocolate Whipped Cream: Add 2 tablespoons of cocoa powder to the whipped cream mixture.
- Strawberry Cream: Blend fresh strawberries and fold them into the whipped cream.
- Coffee Cream: Add 1 tablespoon of instant coffee to give a tiramisu-inspired taste.
Tips for Consistency
Make sure your filling is thick enough to hold between the layers without dripping. If it’s too runny, refrigerate it for a bit before using.
6. Layering the Crepe Cake
Now, we’re onto the most satisfying part: layering your crepe cake! This part takes a little patience, but its well worth the effort.
Starting Sentence: “Layering the crepe cake is where the magic happens, turning simple crepes into a decadent cake.”
- Start with a Crepe: Place one crepe on your cake stand or serving plate.
- Add Filling: Spread a thin, even layer of cream filling across the crepe using an offset spatula.
- Repeat: Place another crepe on top and repeat the process until all crepes are stacked.
- Top Layer: For the final crepe, add a slightly thicker layer of filling and decorate as desired.
7. Decorating Your Crepe Cake
Once you’ve assembled your crepe cake, it’s time to make it look as impressive as it tastes. A beautifully decorated crepe cake can be the highlight of any dessert table.
Starting Sentence: “A well-decorated crepe cake not only tastes great but also looks stunning as a centerpiece.”
Simple Decoration Ideas
- Powdered Sugar Dusting: Lightly sift powdered sugar over the top for a classic, elegant finish.
- Cocoa Powder: Add a dusting of cocoa powder for a subtle chocolate flavor and a sophisticated look.
- Fresh Berries: Arrange strawberries, blueberries, or raspberries on top for a pop of color and freshness.
Advanced Decoration Options
- Mirror Glaze: Pour a chocolate or fruit-flavored mirror glaze over the top for a glossy, professional look.
- Chocolate Drizzle: Melt chocolate and drizzle it over the top and sides, letting it naturally drip down the edges.
- Edible Flowers: Decorate with edible flowers for a beautiful, spring-like effect.
Tips for Slicing: For the cleanest cuts, chill the crepe cake in the refrigerator for at least 1 hour before slicing. Use a sharp knife, wiping it between cuts for smooth slices.

8. Tips for Serving and Storing Your Crepe Cake
Once your crepe cake is ready, it’s important to know how to serve and store it properly to maintain its freshness and flavor.
Opening Line: “Once your crepe cake is ready, think about the ideal ways to serve and store it to keep its flavor and freshness at their best.”
Serving Tips
- Chill Before Serving: For the best texture, let the crepe cake chill for at least 1-2 hours before serving. This gives the layers time to firm up, which simplifies the slicing process.
- Ideal Temperature: Serve chilled or at room temperature, depending on the filling. Creamy fillings taste best when slightly cold.
Storing Tips
- Refrigeration: Wrap the cake tightly in plastic wrap and store it in the refrigerator for up to 2-3 days.
- Freezing: You can freeze crepe cakes by wrapping them tightly in plastic wrap and aluminum foil. You can store them in the freezer for a maximum of two months. Remember to thaw them in the refrigerator overnight before serving.
Tip: If you’re making the cake in advance, consider adding fresh toppings, like berries or whipped cream, just before serving for the freshest look.
9. Troubleshooting Common Issues
Making a crepe cake can be challenging, especially for beginners. Here are some common issues you might face and tips to fix them.
Beginning Statement: ” In case you meet any challenges while assembling your crepe cake, there’s no need to be concerned—here are some typical issues along with their solutions.”
Common Problems and Solutions
| Problem | Solution |
| Batter too thick or too thin | Adjust by adding a bit more milk for thinner batter or flour for thicker batter. |
| Crepes sticking to the pan | Ensure the pan is hot enough before pouring batter and use a small amount of butter. |
| Layers sliding during stacking | Spread a thin, even layer of filling and refrigerate periodically to help set the layers. |
| Uneven crepes or tearing | Use a consistent amount of batter each time and flip gently to prevent tearing. |
Each of these solutions can help prevent small mishaps from affecting your final result, making it easier to achieve a beautifully layered crepe cake.
10. Indulge in Your Homemade Crepe Cake!
You’ve made it! By now, you should have a gorgeous, homemade crepe cake ready to share (or savor all by yourself). Making a crepe cake is a unique culinary experience, one that requires patience but rewards you with a stunning dessert that’s perfect for celebrations, holidays, or simply for the joy of baking.
Starting Sentence: “Creating a crepe cake is a rewarding culinary project, and with this guide, you’re well on your way to mastering this beautiful dessert.”
With its delicate layers and endless possibilities for flavor combinations, a crepe cake is as versatile as it is delicious. Take pride in your accomplishment, and don’t hesitate to try new variations and fillings each time you make one. Enjoy your crepe cake, and remember that each layer you stack is a step toward dessert perfection!
Frequently Asked Questions (FAQs)
1. Can you make the crepes in advance?
Yes! You can make crepes up to two days in advance. Stack them with a layer of parchment paper between each crepe and store them in an airtight container in the refrigerator.
2. What other fillings can be used in a crepe cake?
Apart from whipped cream, you can use mascarpone, lemon curd, Nutella, or flavored yogurt. Experiment with different fillings to suit your taste.
3. Can crepe cakes be made gluten-free?
Absolutely! Substitute all-purpose flour with a gluten-free flour blend to make gluten-free crepes.
4. How long does a crepe cake stay fresh?
A crepe cake typically stays fresh for 2-3 days in the refrigerator. Just be sure to keep it wrapped tightly to avoid drying out.
5. Can I add food coloring to my crepe cake?
Yes, you can add food coloring to the crepe batter to create a rainbow effect or a specific theme. Just add a few drops of coloring to the batter before cooking.

